Google Analytics 4 (GA4) is new and totally different. It’s a complete re-work of Universal Analytics (the “old” google analytics you are using today), but it’s not a replacement (yet).
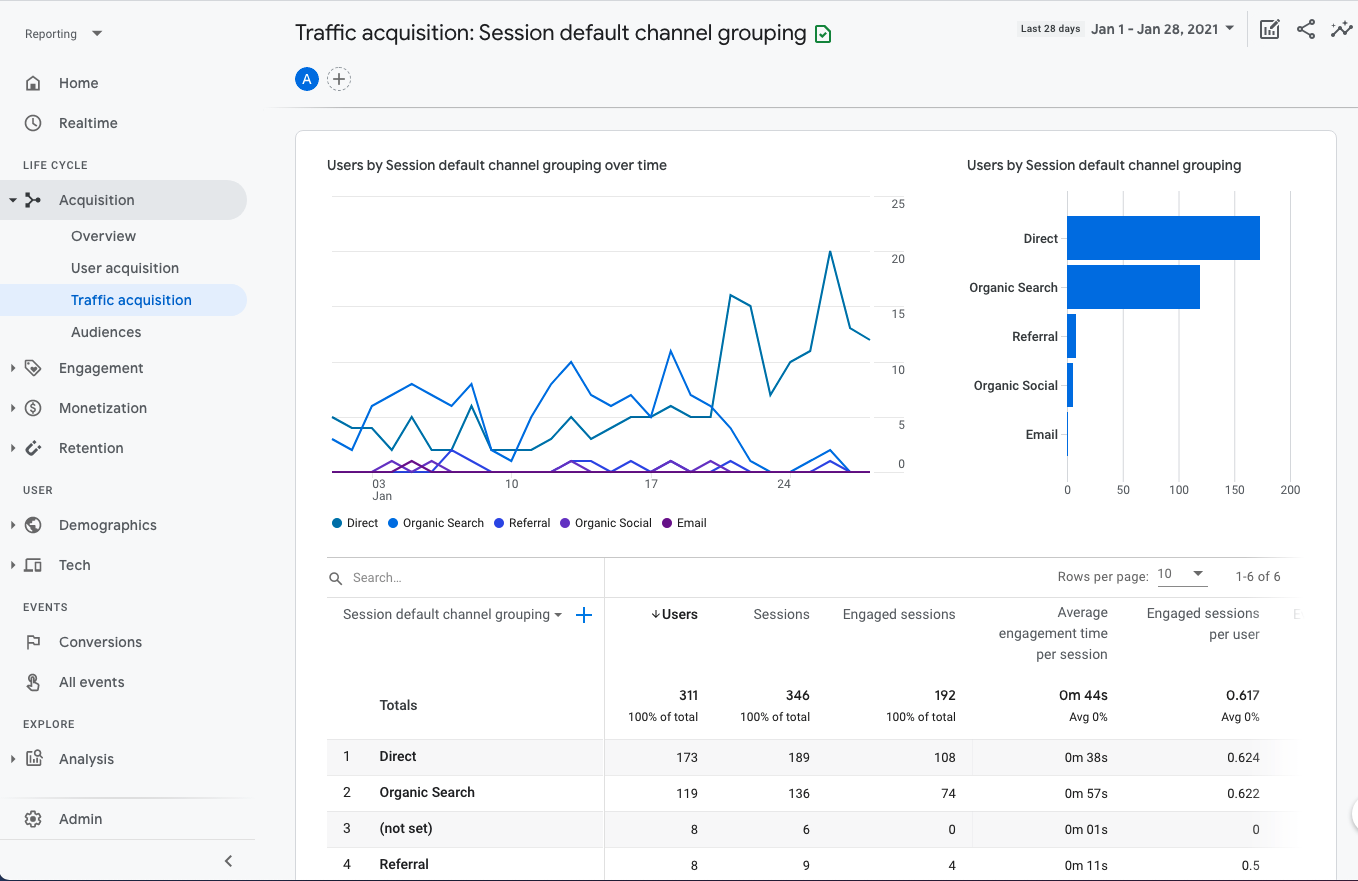
Here’s a look at the revamped version of my beloved Traffic report by channel.
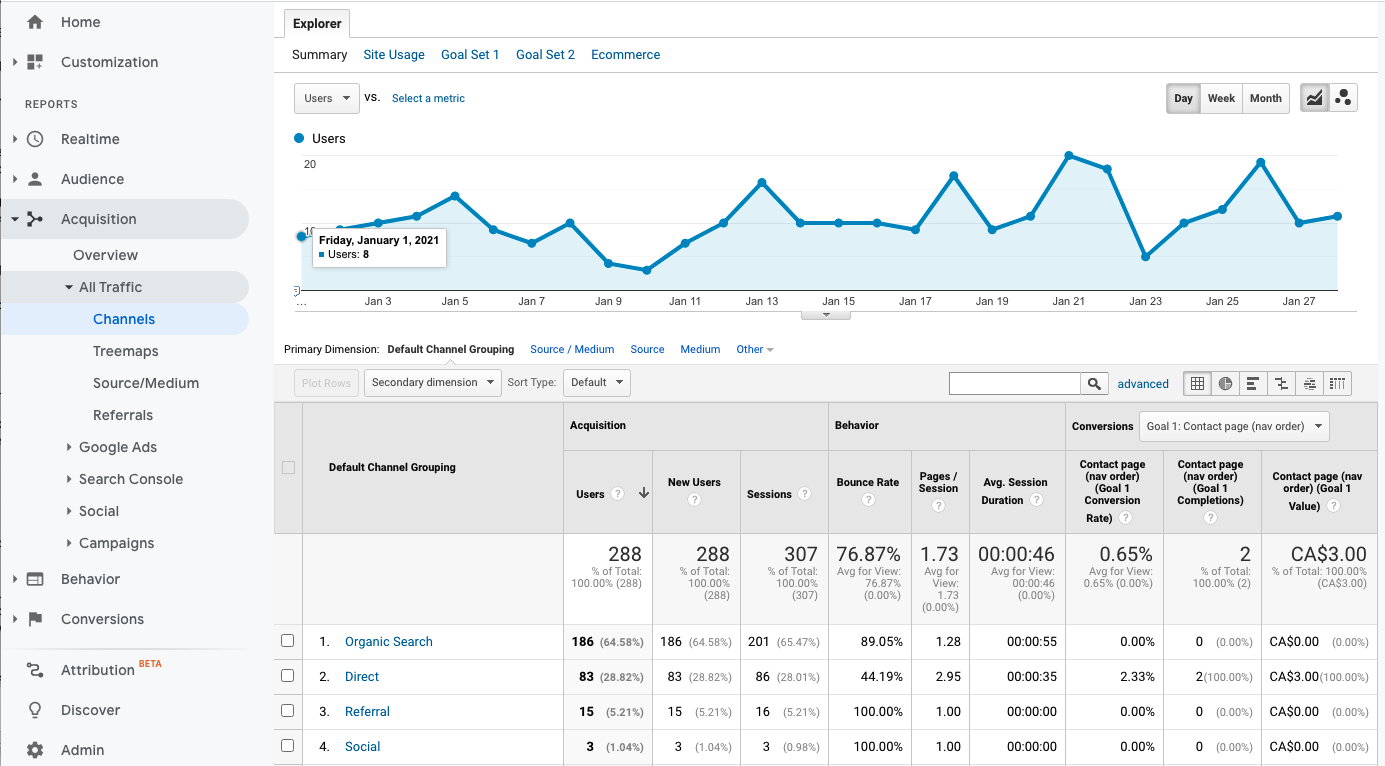
And here’s what the current Traffic > All Channels report looks like. Looks different right? And obviously I have some sleuthing to do before I can understand the discrepancies in the data. Sigh.
My personal opinion is that GA4 is not ready for prime time. For example, how do I advance search with include or exclude? At the admin level can I manage self-referrals? My list goes on. Regardless, Google is pushing new accounts to create GA4 properties. You can still generate the code for a Universal Analytics property under advanced options, but the writing is on the wall. GA4 is the new default. Eventually you will have to switch.
In the meantime, it’s worth installing GA4 and running it in parallel to your current google analytics setup. If you start capturing data now, you build up historical data in the account for future analysis, and you have a longer lead time to figure out the data discrepancies and map any customized reports or settings. Tip: Use datastudio to create comparative reports so you can see what Universal Analytics is capturing vs. GA4. ClickInsight has a great post here.
As you can see above in the first image, GA4 looks wildly different. I stubbornly don’t want to figure it out, but adding the new property is simple and offers a little futureproofing to your analytics transition.
To setup parallel tracking, log into Google Analytics. You’ll probably see a banner at the top with a link to migrating to GA4 or the GA4 Setup Assistant.
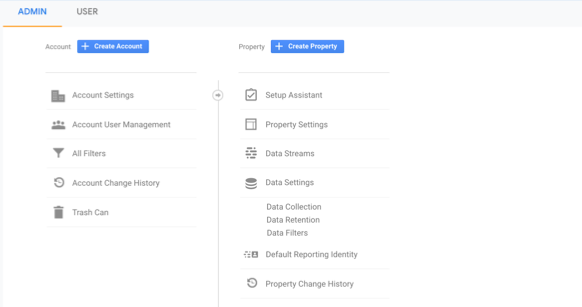
Step 1: Admin > Property > Setup Assistant. (If you are not running analytics on your site currently, then click Create Property.)
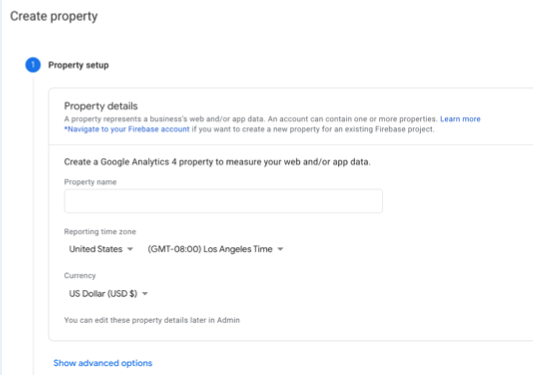
Step 2: Name your new property. Use the same naming taxonomy that you have for the current setup, but add GA4, i.e., MySite.com GA4.
Step 3: Enter your website URL and enable “Enhanced measurement” because this is what tells GA4 to collect pageviews, scrolls, outbound clicks, etc.
Then click Create Stream.
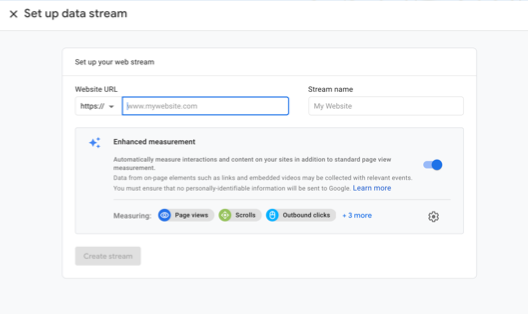
Step 4. Install your new GA tracking code on your site. You can do this using Google Tag Manager (GTM) or by manually adding the code to your site.
> If you are using GTM, you need to copy the stream’s measurement ID.
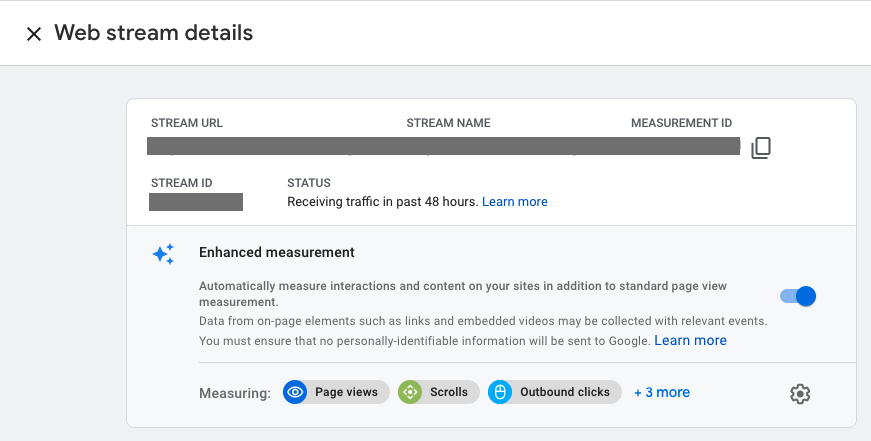
Then log into Tag Manager (use the existing container for your site) and create a GA4 configuration tag. Paste the measurement ID into that tag and set up a pageview to trigger that tag, fire on all pages.
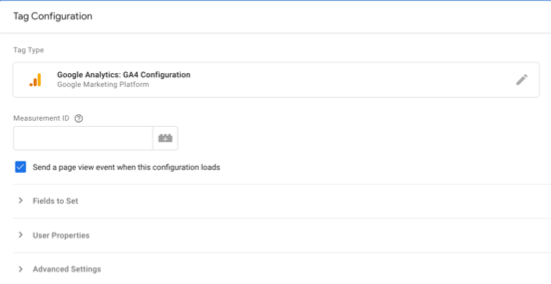
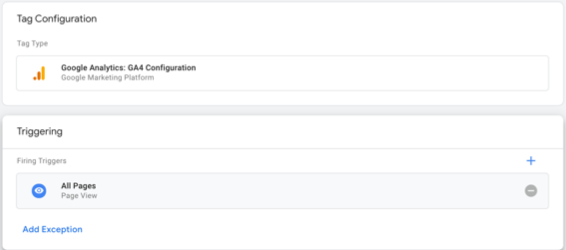
Easy peasy.
Test the tag in preview mode then publish it. I started seeing data in GA4 within 30 minutes.
> If you are installing the code manually, then in the Tagging Instructions > add new on-page tag, you will see the Global Site Tag (gtag.js). Copy and paste that code as the first item in the head section of every webpage.
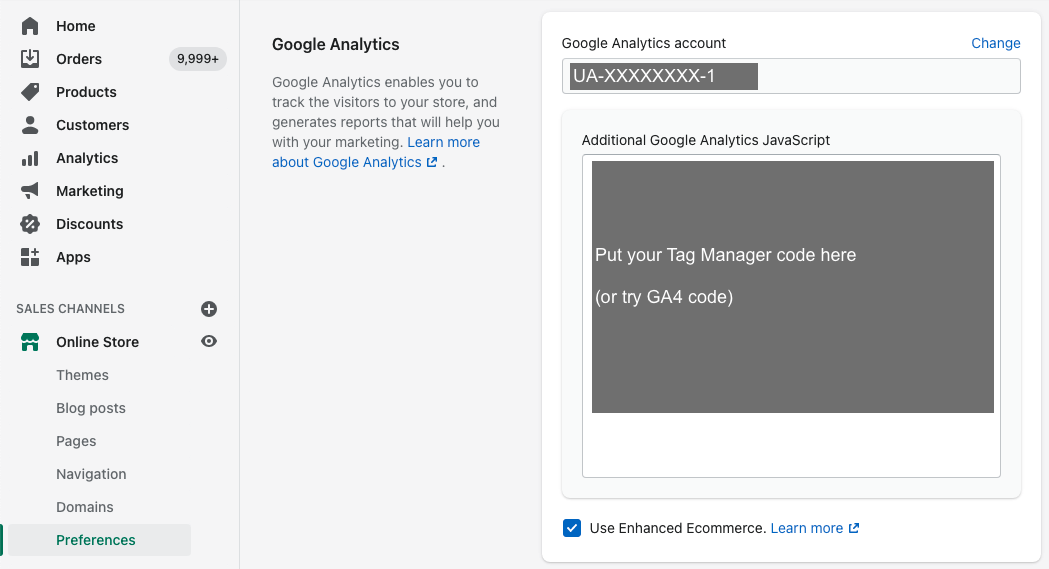
Presumably your site using include files and you can put this code into one place. If you are using WordPress then find a GA4 plugin to simplify this setup. And if you’re using Shopify then add the code to the “Additional Google Analytics JavaScript” field under Online Store > Preferences. (Although I highly recommend using Google Tag Manager instead.)
Good luck!


